5. Creating Build Pipeline
In this step, you are going to create a CI/CD pipeline where you will build a container image on new commit and store the image in our new ECR repository.
AWS CodePipeline is a fully managed continuous delivery service that helps you automate your release pipelines for fast and reliable application and infrastructure updates. CodePipeline automates the build, test, and deploy phases of your release process every time there is a code change, based on the release model you define. AWS CodeBuild is a fully managed continuous integration service that compiles source code, runs tests, and produces software packages that are ready to deploy. With CodeBuild, you don’t need to provision, manage, and scale your own build servers.
STEP 1 You are going to need to install CodePipeline and CodeBuild construct libraries. Execute command below.
npm i @aws-cdk/aws-codebuild @aws-cdk/aws-codepipeline @aws-cdk/aws-codepipeline-actions
STEP 2 Create file buildspec.yml in the root directory of the application. This file will serve as build definition that we are
version: '0.2'
phases:
  pre_build:
    commands:
    - aws --version
    - $(aws ecr get-login --region ${AWS_DEFAULT_REGION} --no-include-email |  sed 's|https://||')
    - COMMIT_HASH=$(echo $CODEBUILD_RESOLVED_SOURCE_VERSION | cut -c 1-7)
    - IMAGE_TAG=${COMMIT_HASH:=latest}
  build:
    commands:
    - docker build -t $REPOSITORY_URI:latest .
    - docker tag $REPOSITORY_URI:latest $REPOSITORY_URI:$IMAGE_TAG
  post_build:
    commands:
    - docker push $REPOSITORY_URI:latest
    - docker push $REPOSITORY_URI:$IMAGE_TAG
    - printf "[{\"name\":\"${CONTAINER_NAME}\",\"imageUri\":\"${REPOSITORY_URI}:latest\"}]" > imagedefinitions.json
artifacts:
  files:
  - imagedefinitions.json
STEP 3 Overwrite file lib/myapp-stack.ts with this.
import * as cdk from '@aws-cdk/core';
import * as codecommit from '@aws-cdk/aws-codecommit';
import * as ecs from '@aws-cdk/aws-ecs';
import * as ecsPatterns from '@aws-cdk/aws-ecs-patterns';
import * as ecr from '@aws-cdk/aws-ecr';
import * as codebuild from '@aws-cdk/aws-codebuild';
import * as codepipeline from '@aws-cdk/aws-codepipeline';
import * as codepipelineActions from '@aws-cdk/aws-codepipeline-actions';

export class MyappStack extends cdk.Stack {
  private codeRepository: codecommit.Repository;
  private cluster: ecs.Cluster;
  private service: ecs.BaseService;
  private imageRepository: ecr.Repository;

  constructor(scope: cdk.Construct, id: string, props?: cdk.StackProps) {
    super(scope, id, props);

    this.createCodeCommitRepository();
    this.createECSApplication();
    this.createECRRepository();
    this.createPipeline();
  }

  createCodeCommitRepository() {
    this.codeRepository = new codecommit.Repository(this, 'CodeRepository', {
      repositoryName: 'MyRepository'
    });
  }

  createECSApplication() {
    this.cluster = new ecs.Cluster(this, 'Cluster');
    const fargateService = new ecsPatterns.ApplicationLoadBalancedFargateService(this, 'Service', {
      cluster: this.cluster,
      memoryLimitMiB: 1024,
      cpu: 512,
      taskImageOptions: {
        image: ecs.ContainerImage.fromAsset('.'),
        containerName: 'web',
      },
    });

    this.service = fargateService.service;
  }

  createECRRepository() {
    this.imageRepository = new ecr.Repository(this, 'ImageRepository');
    new cdk.CfnOutput(this, 'ImageRepositoryURI', { value: this.imageRepository.repositoryUri });
  }

  createPipeline() {
    const pipeline = new codepipeline.Pipeline(this, 'Pipeline', {
      stages: this.createPipelineStages(),
    });
  }

  createPipelineStages() {
    const sourceOutput = new codepipeline.Artifact();
    const buildOutput = new codepipeline.Artifact();
    return [
      this.createStageSource(sourceOutput),
      this.createStageBuild(sourceOutput, buildOutput),
    ];
  }

  createStageSource(output: codepipeline.Artifact): codepipeline.StageOptions {
    const action = new codepipelineActions.CodeCommitSourceAction({
      actionName: 'CodeCommit',
      repository: this.codeRepository,
      output: output,
    });
    return {
      stageName: 'Source',
      actions: [
        action
      ]
    };
  }

  createStageBuild(input: codepipeline.Artifact, output: codepipeline.Artifact): codepipeline.StageOptions {
    const project = new codebuild.PipelineProject(this, 'ImageBuildProject', {
      environment: {
        buildImage: codebuild.LinuxBuildImage.STANDARD_2_0,
        privileged: true,
      },
      buildSpec: codebuild.BuildSpec.fromSourceFilename('buildspec.yml'),
      environmentVariables: {
        REPOSITORY_URI: {value: this.imageRepository.repositoryUri},
        CONTAINER_NAME: {value: "web"},
      }
    });

    this.imageRepository.grantPullPush(project.grantPrincipal);

    const action = new codepipelineActions.CodeBuildAction({
      actionName: 'ImageBuildAction',
      input: input,
      outputs: [output],
      project: project,
    });

    return {
      stageName: 'Build',
      actions: [
        action
      ]
    };
  }
}
STEP 4 Execute following line to apply the change.
cdk deploy
Input y on the prompt.
To see the newly created pipeline, open the CodePipeline console. You will see you have a new pipeline.
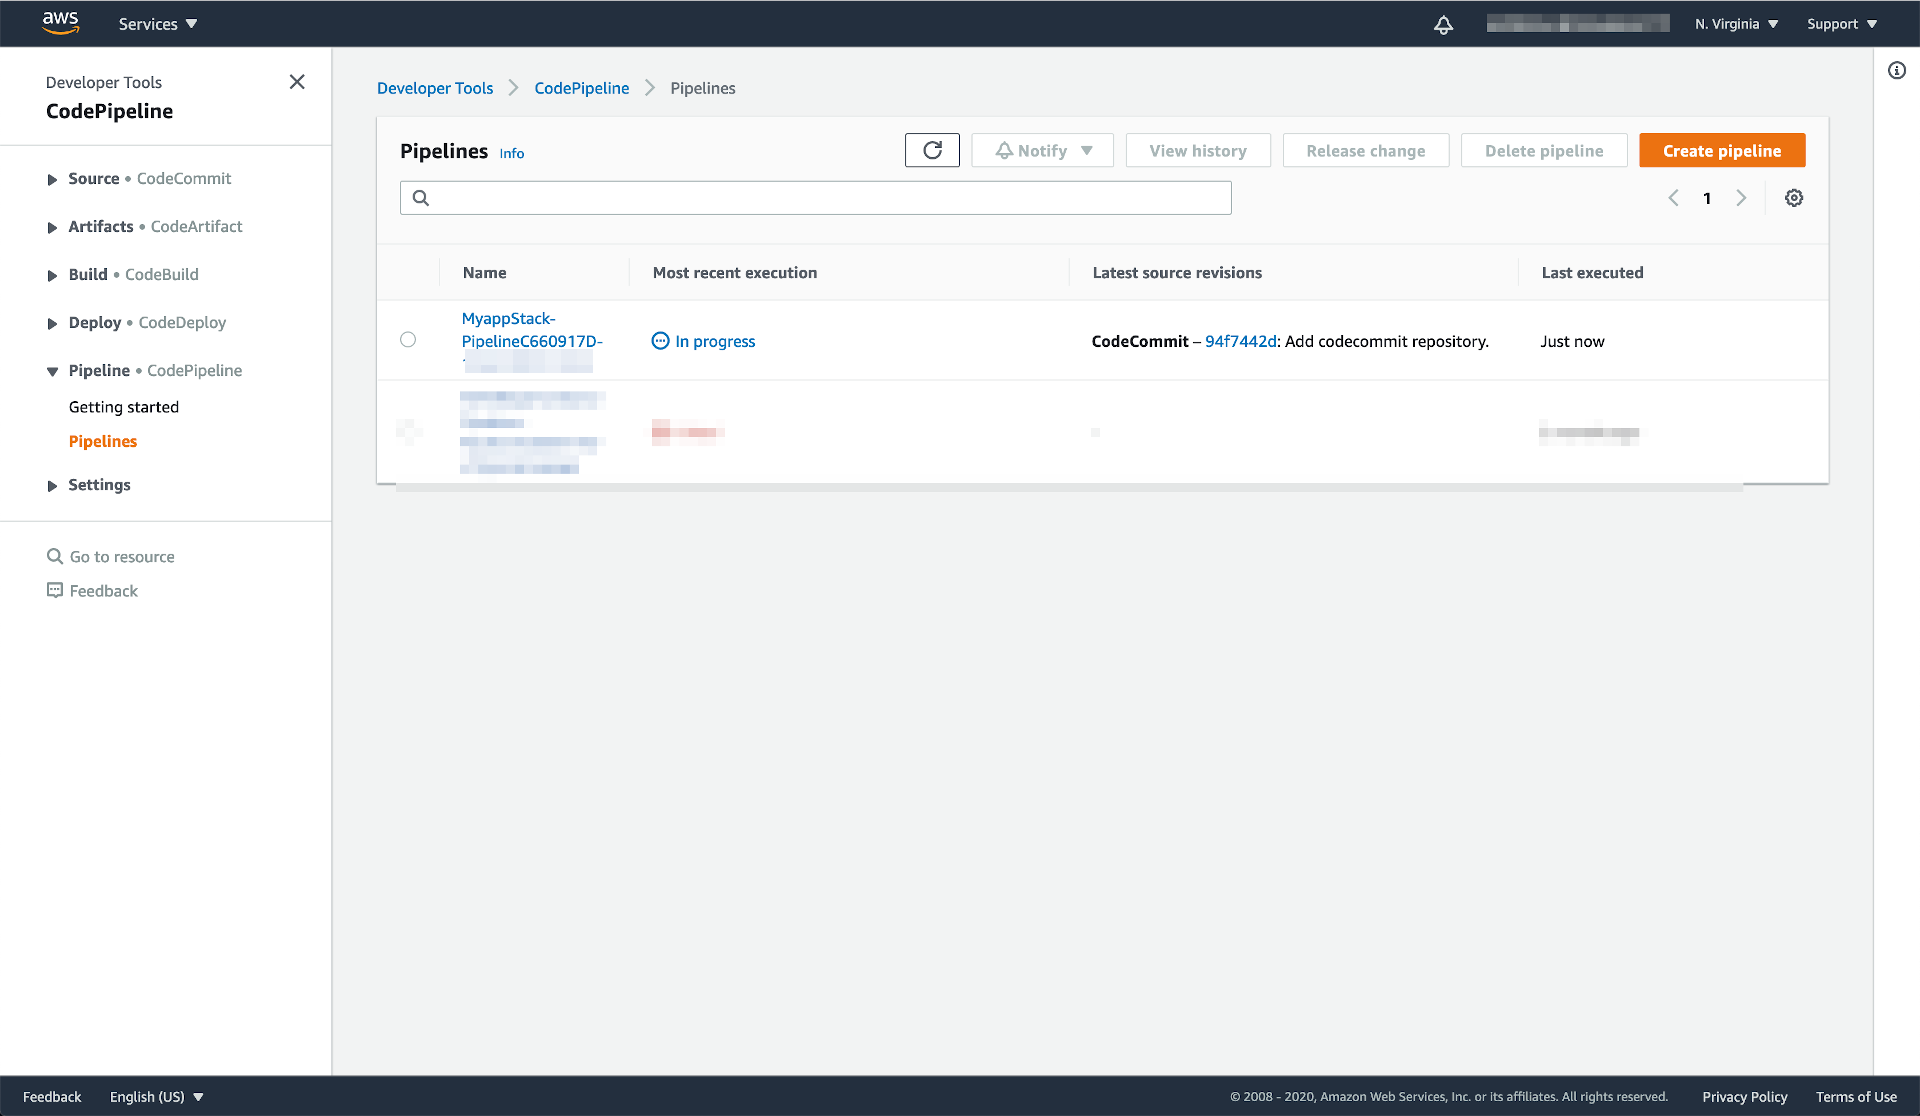
Open the new pipeline, you will have 2 stages: Source and Build

You now may see the Build process fails. In the next part you will push the code that will trigger a success build.
Committing Code to Trigger Build
Now you are going to trigger the build process by committing a new code.
STEP 1 Since you haven’t committed any new code yet, now it’s time to push the changes to git.
git add .
git commit -m "Add build pipeline."
git push origin master
Open the pipeline again in the CodePipeline console. You will see that a build process now is in progress.
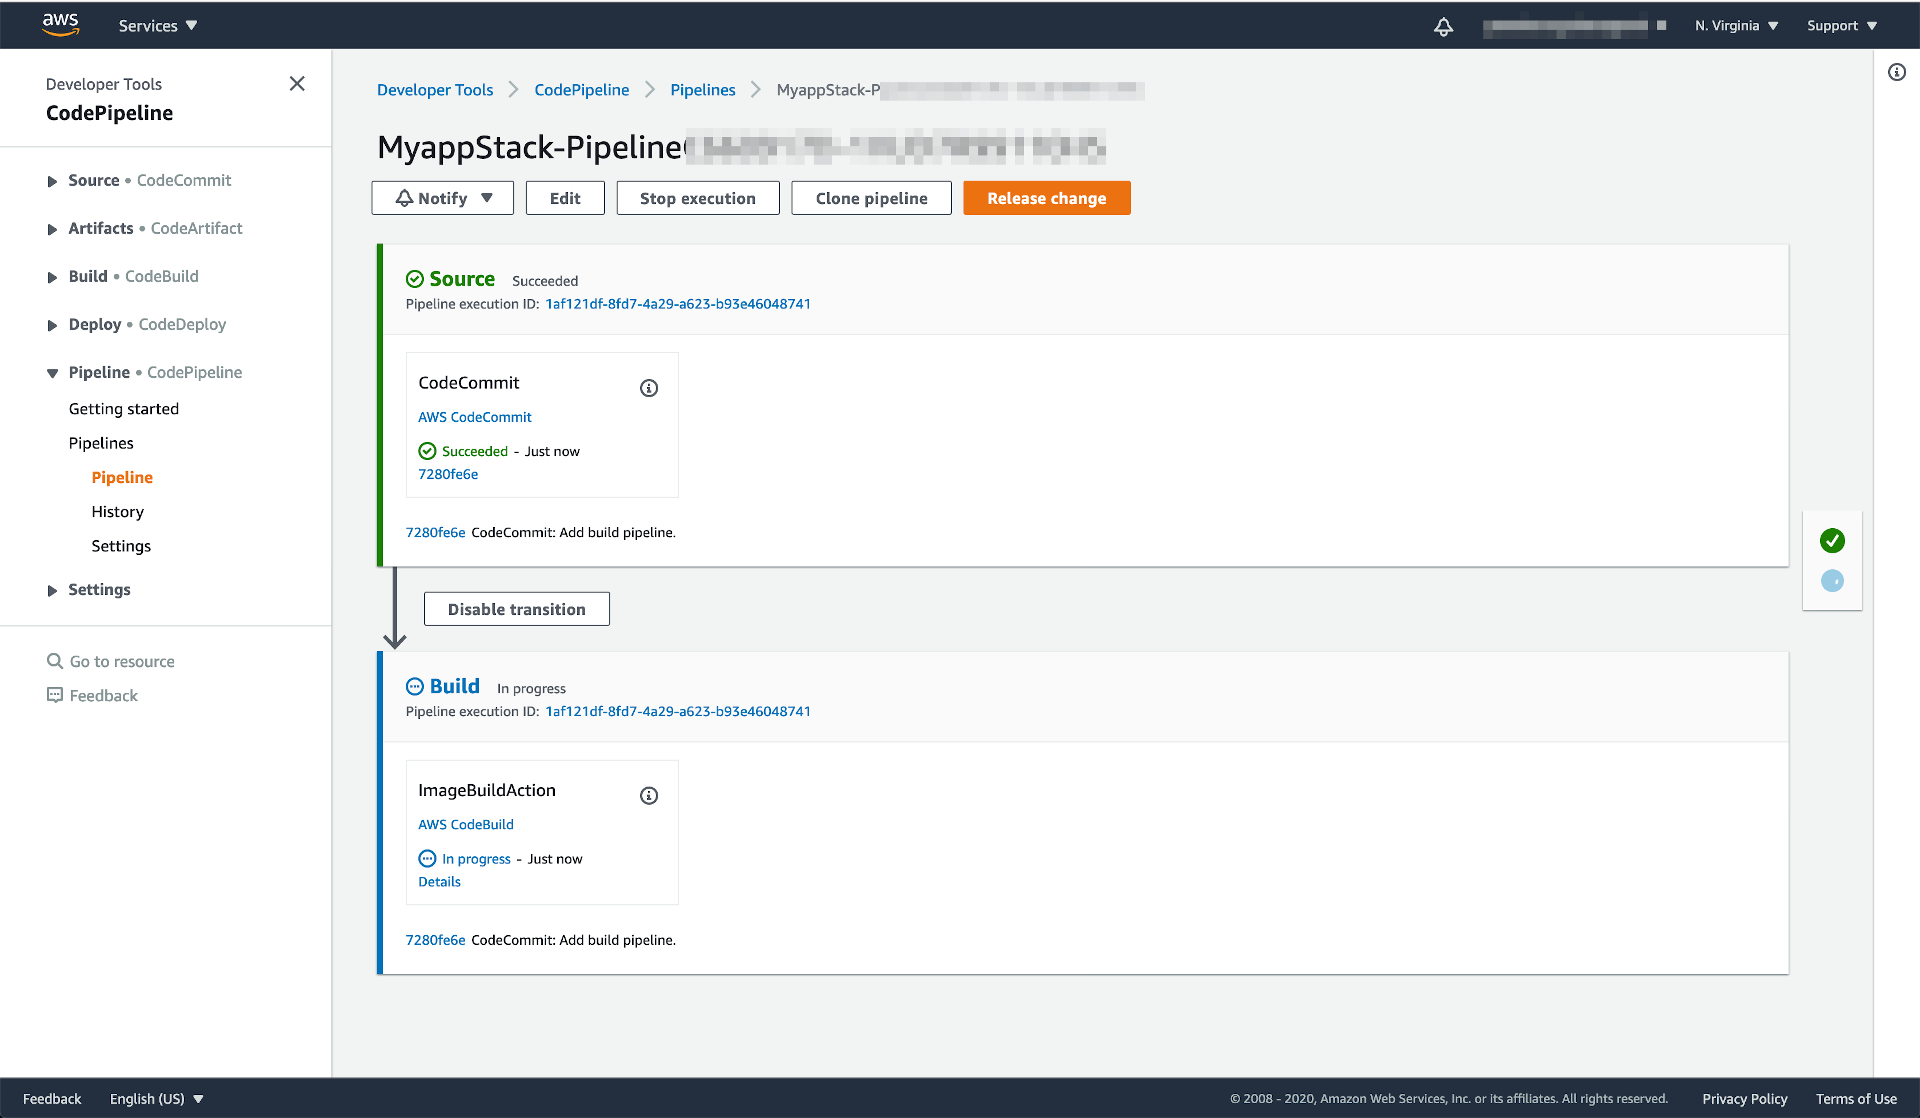
You can click on the Details in the Build stage to monitor the process.
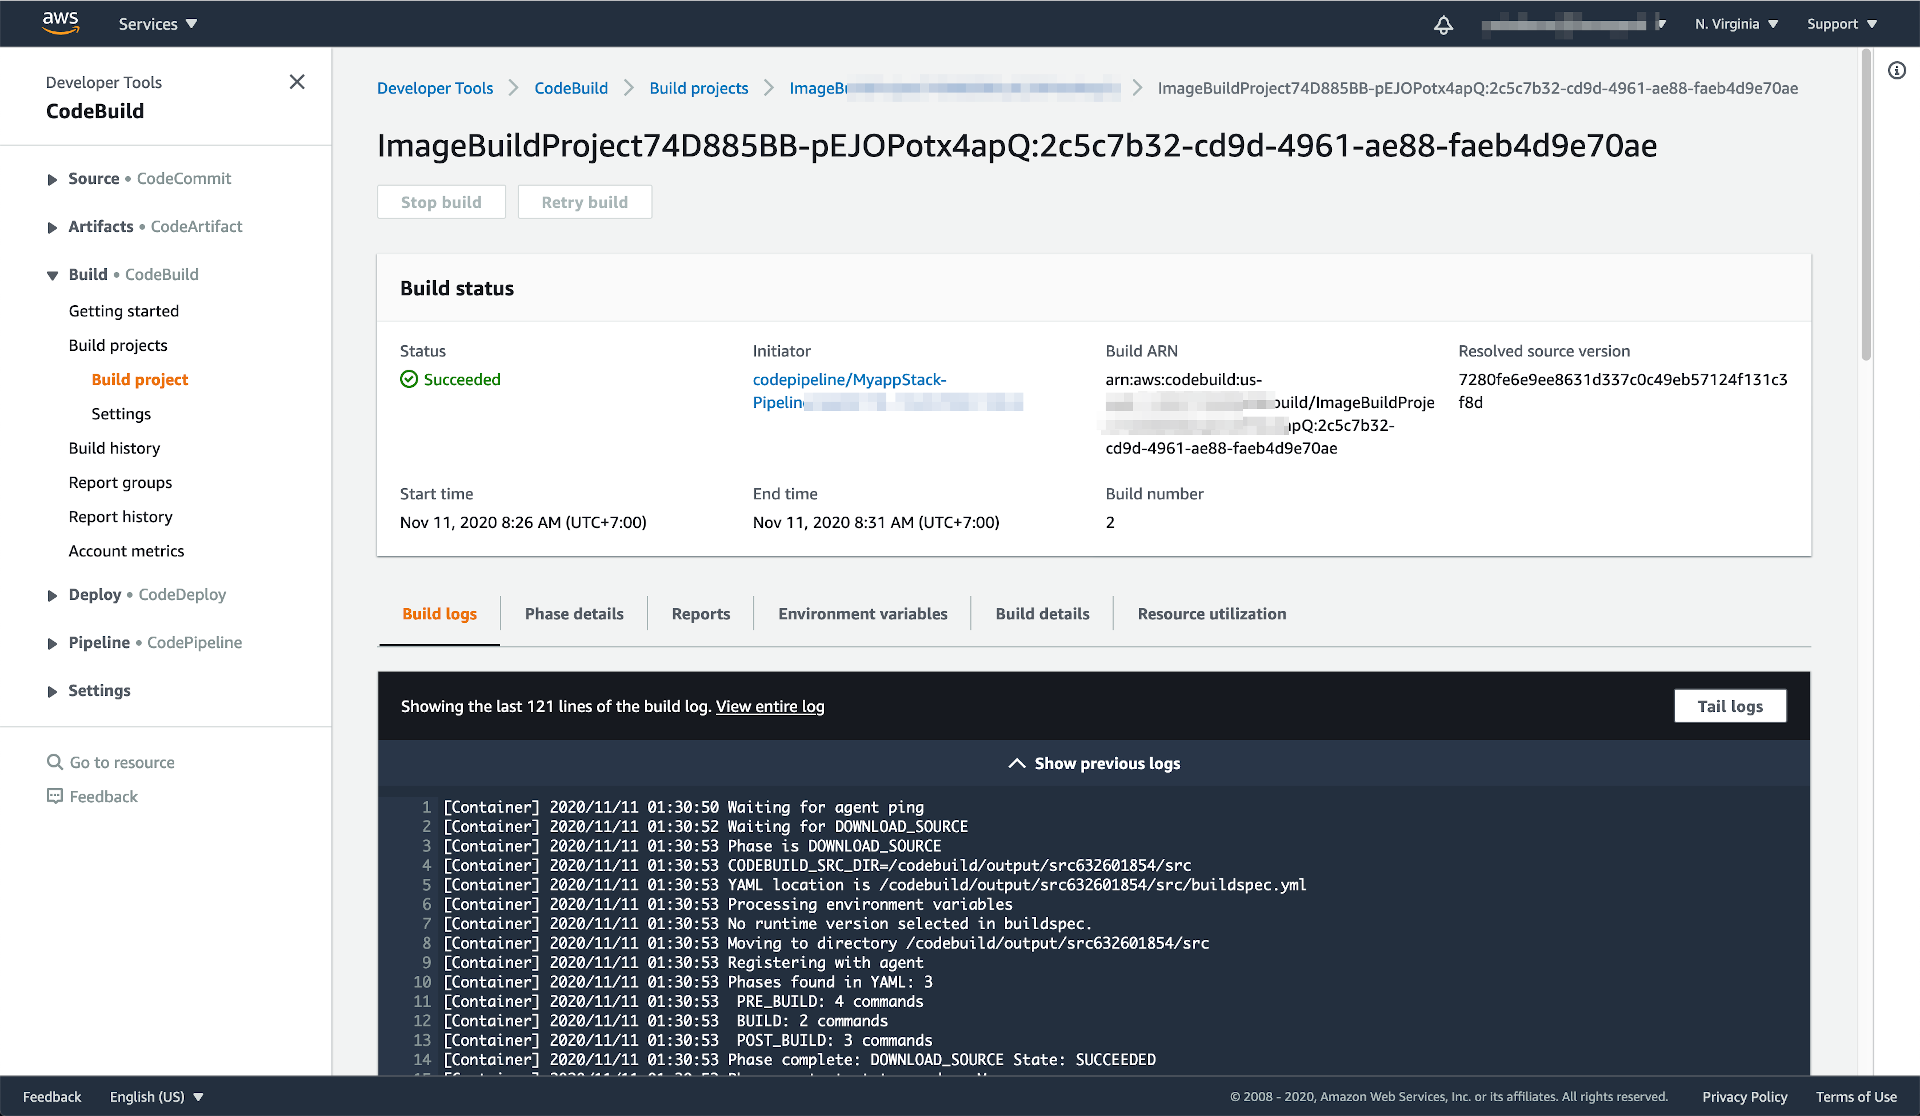
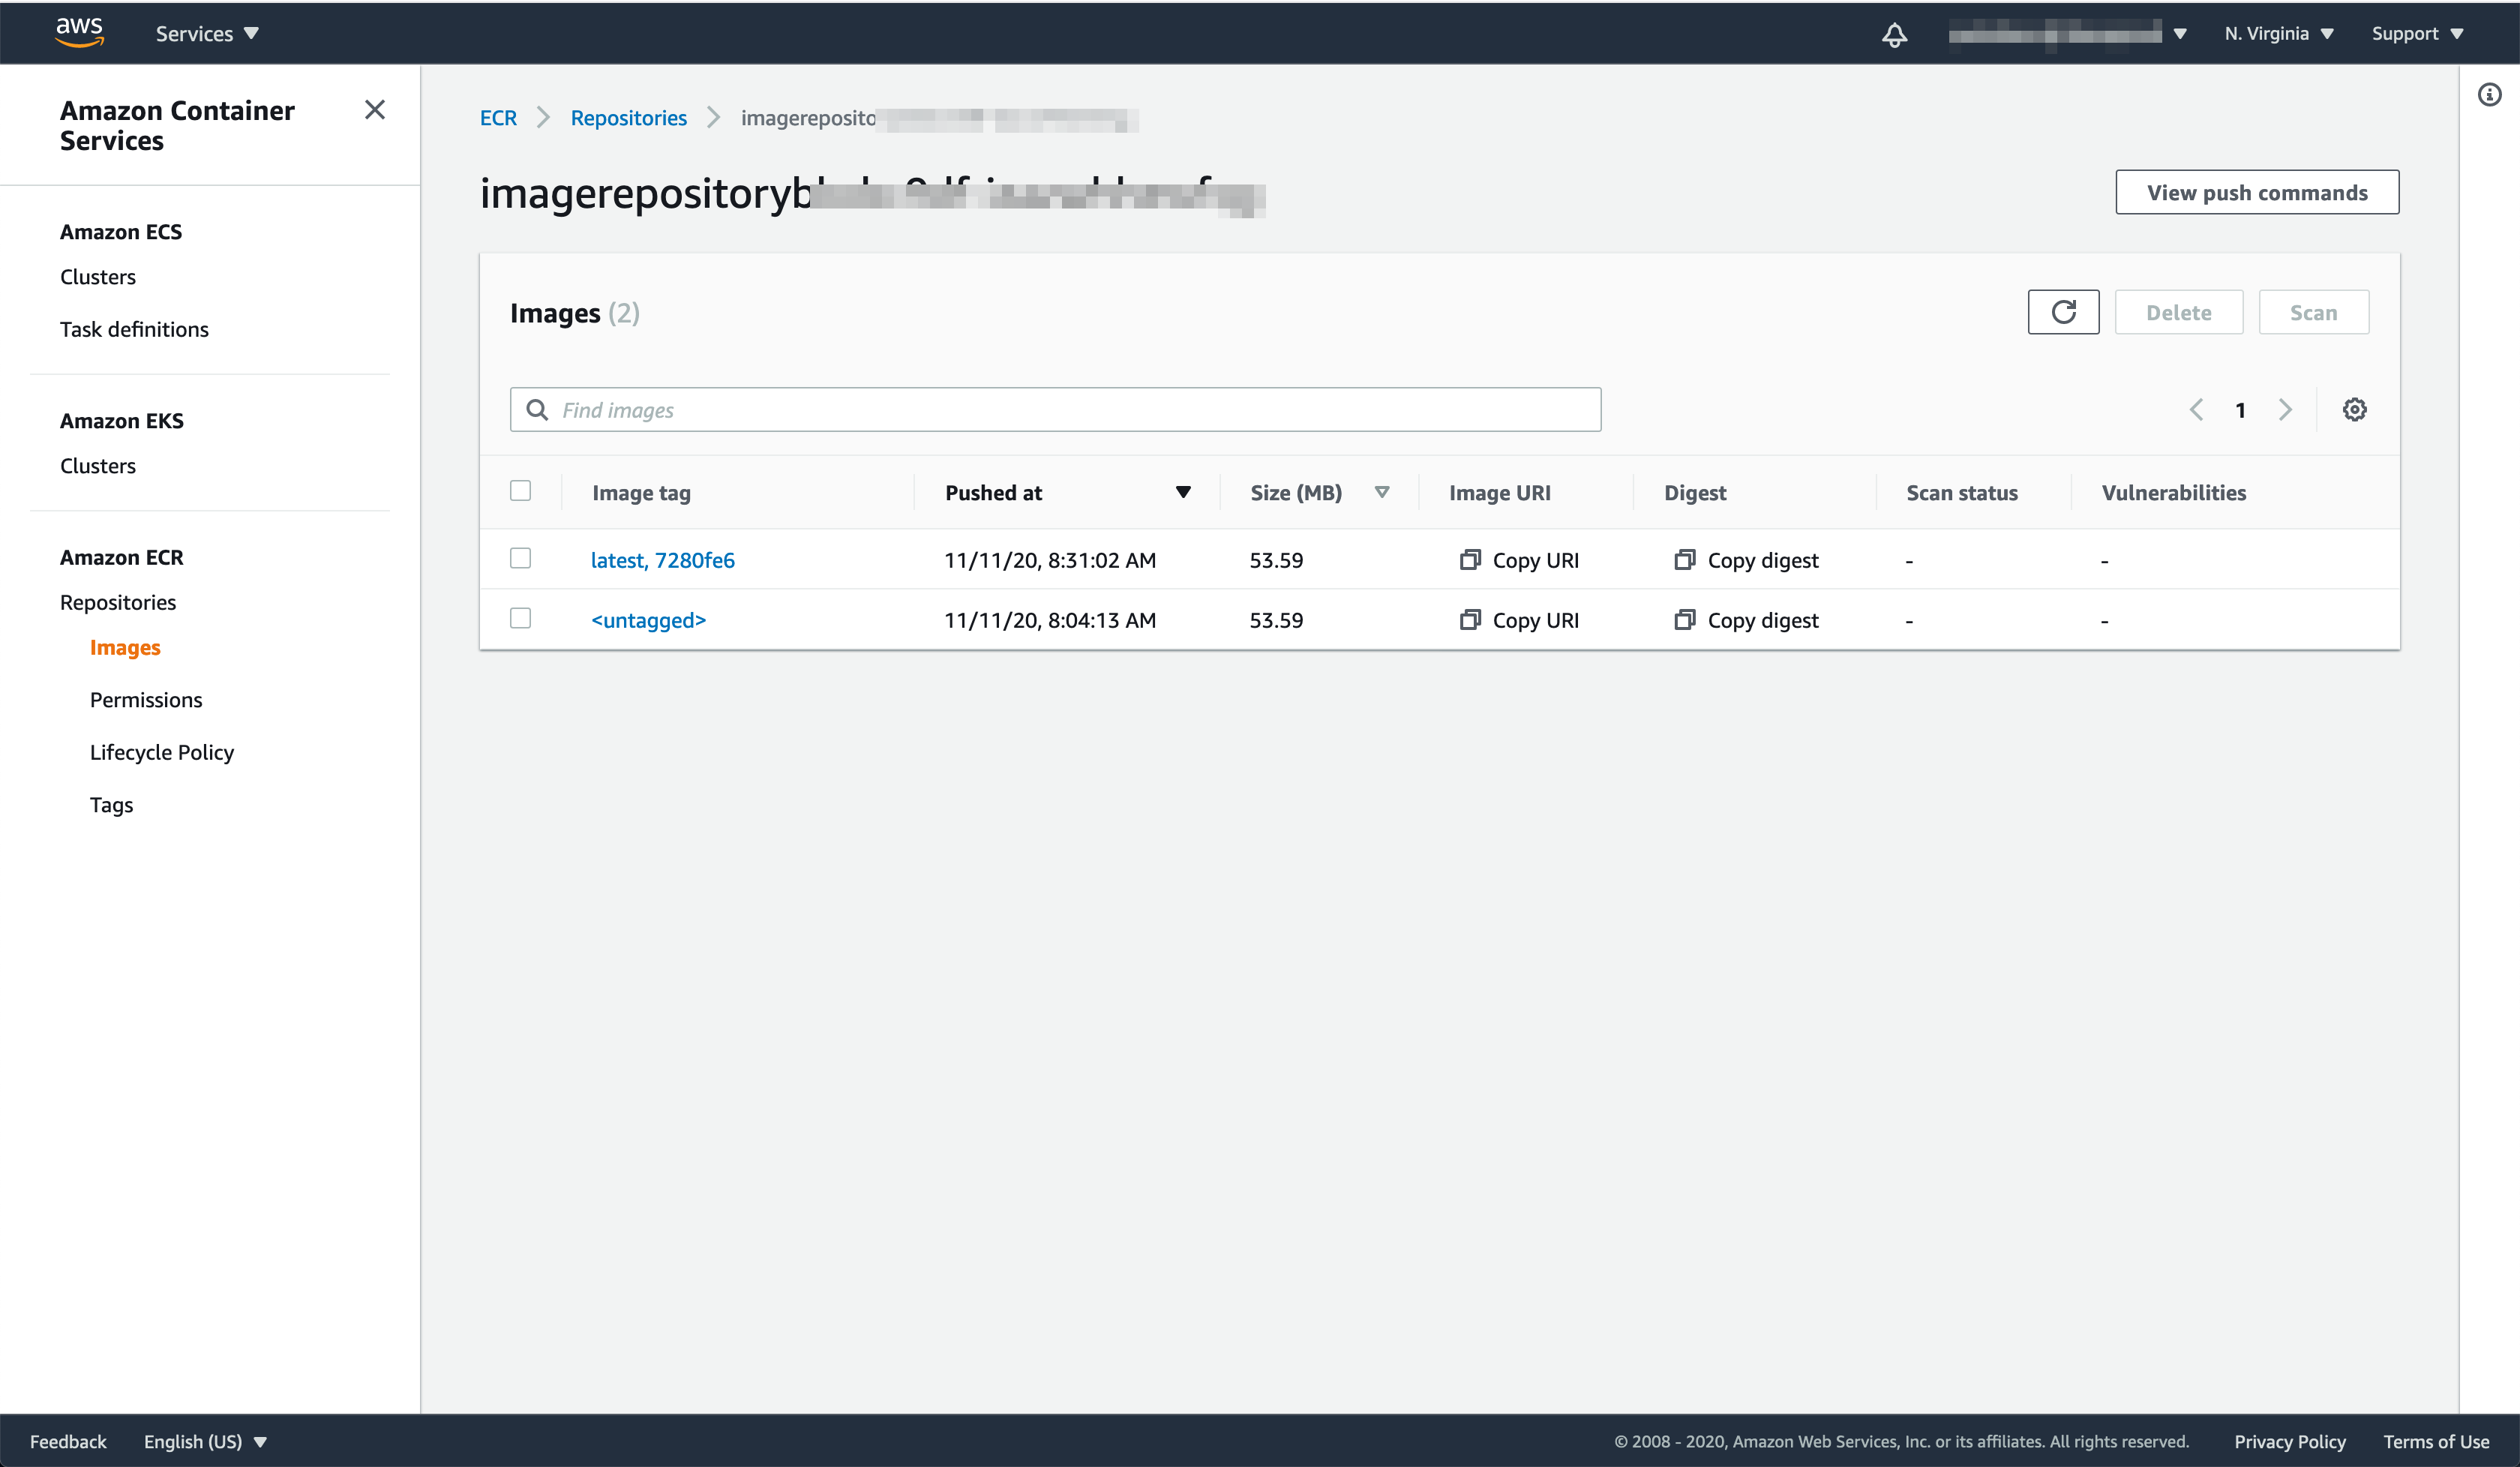
When the build process finishes, open our ECR repository again and you will see a new image has been pushed.
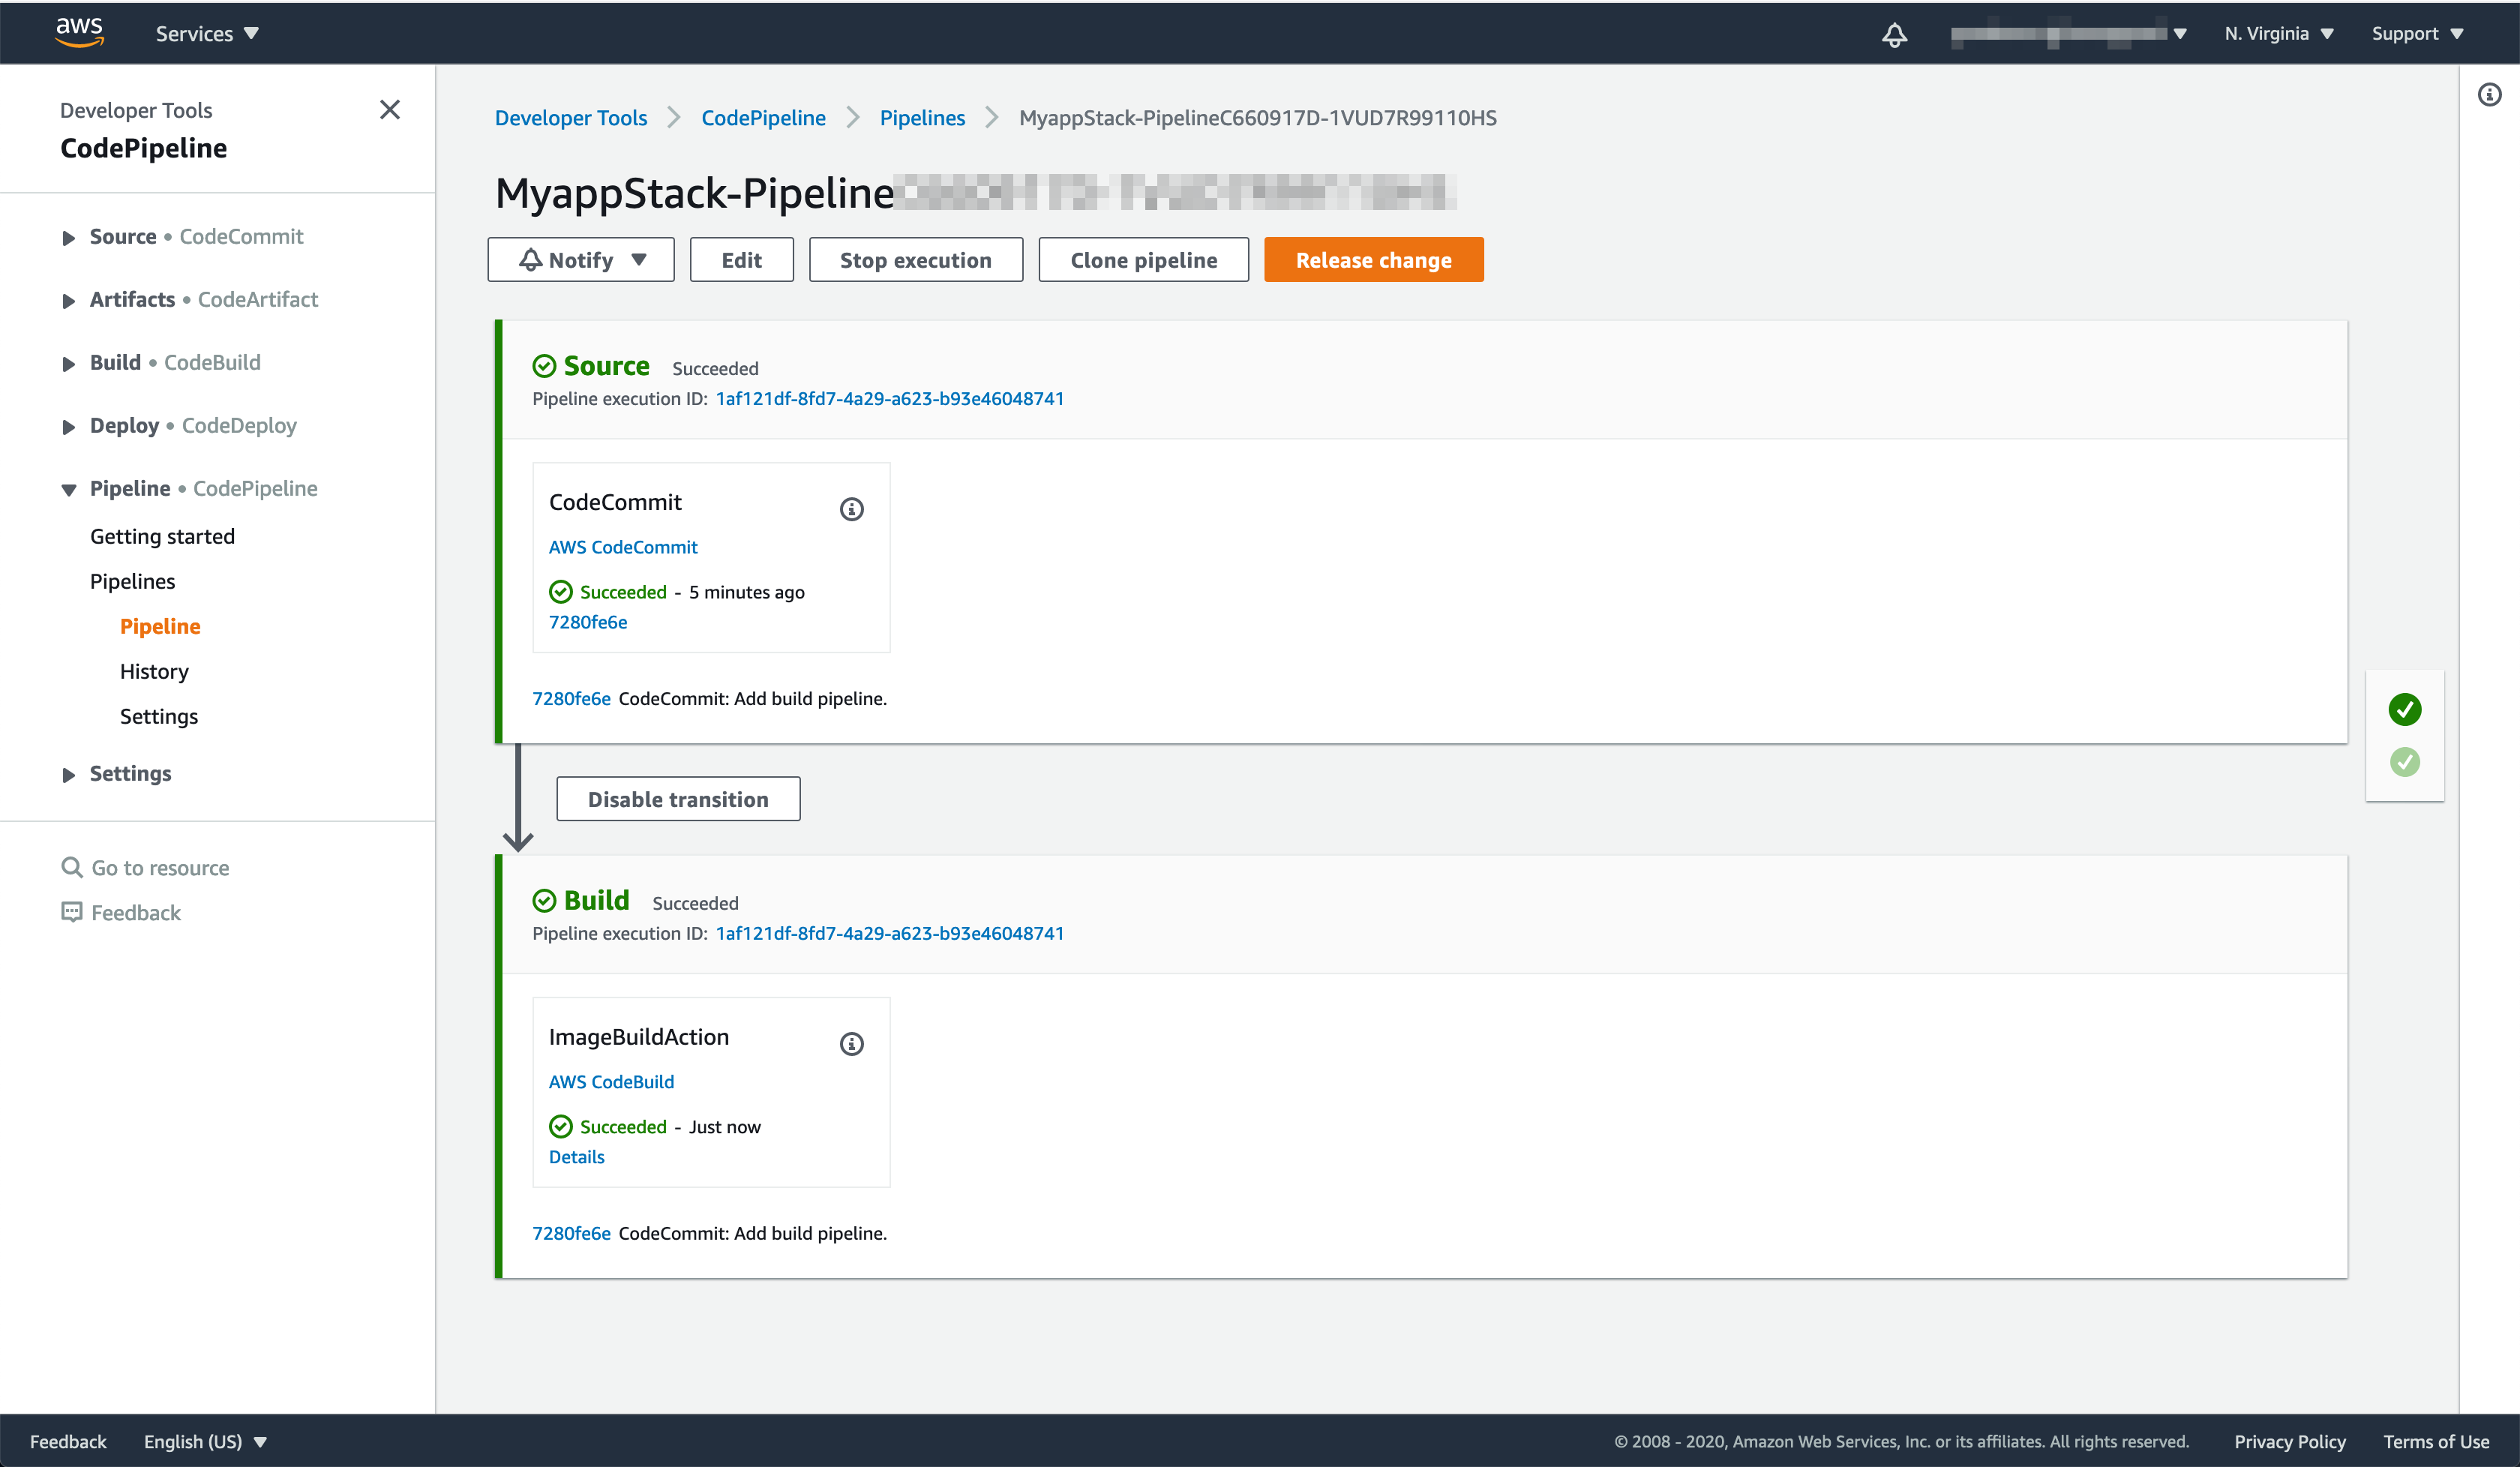
Click the orange arrow on the right hand side to continue to final part of this workshop.